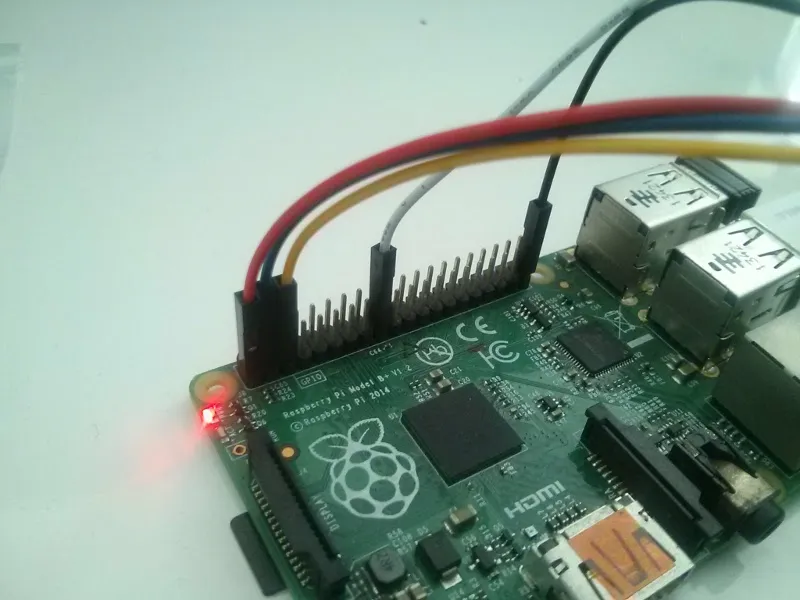
Goal
Learn how to make a program in Go which display RaspberryPi’s IP to an OLED display on boot.
You need:
- Linux host
- RaspberryPi board (and USB-wifi module)
- 2 LEDs
- I2C OLED module
Setup Go development environment
Install Go compiler
Setup path to GOROOT and GOPATH
export GOROOT=/usr/local/go
export GOPATH=$HOME/go
Add following to your .bashrc
export PATH=$GOROOT/bin:$PATH
export PATH=$GOPATH/bin:$PATH
export CDPATH=.:$GOPATH/src/github.com/
Install Atom editor
Install atom packages go-plus:
$ apm install go-plus
Hello world
$ mkdir hello
$ atom main.go
...
$ go build
$ ./hello
src/hello.go
Download and run a Go program
$ go get -u github.com/suapapa/tools/myip
$ myip
IP: 192.168.0.181
Where is the executable:
$ which myip
$GOPATH/bin/myip
Where is the source:
$ cd $GOPATH/src/github.com/suapapa/tools/myip
Install raspbian to RaspberryPi
Setup wifi:
$ sudo vi etc/wpa_supplicant/wpa_supplicant.conf
...
network={
    ssid="IPA1"
    psk="ipa56789"
}

$ sudo ifdown wlan0; sudo ifup wlan0
Send IP to server. replace 192.168.0.181 to your host IP
$ sudo vi etc/rc.local
...
if [ "$_IP" ]; then
  printf "My IP address is %s\n" "$_IP"
  echo "My IP address is $_IP" | nc 192.168.0.181 8081
fi
Cross compile Go program
Download a Go program
Compile it for host OS and Architecture:
$ cd $GOPATH/src/github.com/suapapa/tools/myip
$ go build
$ file myip
myip: ELF 64-bit LSB executable, x86-64, version 1 (SYSV)...
Cross compile it
Cross compile it for target OS and Architecture by setting GOARCH and GOOS:
$ GOARCH=arm GOOS=linux go build
$ file myip
myip: ELF 32-bit LSB executable, ARM, EABI5 version 1 (SYSV)...
Install the executable to the target:
$ scp myip pi@192.168.0.179:~/
$ ssh pi@192.168.0.179
Run it from target:
$ ./myip
IP: 192.168.0.181
Blinking LEDs

Wiring a LED to pin 13 and GND


Write a program to blink a LED
$ go get github.com/davecheney/gpio
$ go doc github.com/davecheney/gpio
example/blink/main.go
package main

import (
	"time"

	"github.com/davecheney/gpio"
)

func main() {
	grn, _ := gpio.OpenPin(13, gpio.ModeOutput)
	defer grn.Close()

	// workaround for bug on initial mode
	grn.SetMode(gpio.ModeInput)
	grn.SetMode(gpio.ModeOutput)

	for i := 0; i < 5; i++ {
		grn.Set()
		time.Sleep(1 * time.Second)
		grn.Clear()
		time.Sleep(1 * time.Second)
	}
}
Compile it on host:
$ GOOS=linux GOARCH=arm go build
$ scp blink pi@192.168.0.179:~/
$ ssh pi@192.168.0.179
Run it on the target:
$ sudo ./blink
Write a program to blink two LEDs in diffrent interval
TODO: video
example/blink2/main.go
Display over the I2C
We will use Waveshare - 1.3inch OLED (B) module which have SH1106 driver
This module support SPI and I2C. Set the module to use I2C.
Enable I2C devfs on RaspberryPi
$ sudo raspi-config$ raspi-config
select 9 Advanced Options -> A7 I2C -> YES
$ lsmod | grep i2c
i2c_bcm2708             5740  0
i2c_dev                 6578  0
$ ls /dev/i2c-1
/dev/i2c-1
Wiring OLED Display
OLED - RaspberryPi
VCC  - 3V3
GND  - GND
DIN  - SDA
CLK  - SCL
RES  - 3V3


Check the connection
$ sudo apt-get install i2c-tools
$ i2cdetect 1
WARNING! This program can confuse your I2C bus, cause data loss and worse!
I will probe file /dev/i2c-1.
I will probe address range 0x03-0x77.
Continue? [Y/n]
     0  1  2  3  4  5  6  7  8  9  a  b  c  d  e  f
00:          -- -- -- -- -- -- -- -- -- -- -- -- --
10: -- -- -- -- -- -- -- -- -- -- -- -- -- -- -- --
20: -- -- -- -- -- -- -- -- -- -- -- -- -- -- -- --
30: -- -- -- -- -- -- -- -- -- -- -- -- 3c -- -- --
40: -- -- -- -- -- -- -- -- -- -- -- -- -- -- -- --
50: -- -- -- -- -- -- -- -- -- -- -- -- -- -- -- --
60: -- -- -- -- -- -- -- -- -- -- -- -- -- -- -- --
70: -- -- -- -- -- -- -- --
Write a program to display a Gopher on the Display

Install depecdency packages:
$ go get -u github.com/suapapa/go_devices/sh1106
Write example/oled_gopher/main.go:
package main

import (
	"image"
	"image/png"
	"os"

	"github.com/suapapa/go_devices/sh1106"
	"golang.org/x/exp/io/i2c"
)

func main() {
	l, err := sh1106.OpenI2C(&i2c.Devfs{Dev: "/dev/i2c-1"}, 0x3C, nil)
	if err != nil {
		panic(err)
	}
	defer l.Close()

	img, err := openPNG("gopher-side_128x64.png")
	if err != nil {
		panic(err)
	}

	l.DrawImage(img)
	l.Display()
}

func openPNG(filename string) (image.Image, error) {
	f, err := os.Open(filename)
	if err != nil {
		return nil, err
	}
	defer f.Close()

	img, err := png.Decode(f)
	if err != nil {
		return nil, err
	}

	return img, nil
}
Build and install:
$ GOOS=linux GOARCH=arm go build
$ scp oled_gopher pi@192.168.0.179:~/
$ scp gopher-side_128x64.png pi@192.168.0.179:~/
gopher image came from https://github.com/golang-samples/gopher-vector
Write a program to display IP on the Display
TODO: example/oled_ip/main.go
$ go get -u github.com/pbnjay/pixfont
$ go doc pixfont
Contribute to an Go packages
Assume contribute to github.com/origid/packagename.
Replace yourid to your id on github. Replace packagename to the actual package name.
Fork it from Github to yourid’s repository Add remote for user repository
$ cd $GOPATH/src/github.com/origid/packagename
$ git remote add yourid https://github.com/yourid/packagename
Make some changes and commit it. And, push it to your repository.
$ git push yourid master:master
Make a pull request to original repository on github.
References
Frameworks for Go IoT